On this tab we can create email accounts, define email forwards and spamfilter settings, configure the system to fetch mail from remote POP3 and/or IMAP servers, set up content filters and black- and whitelists, etc.
3.1 Email Accounts
3.1.1 Domain
Here we can define the domains for which we want to set up email accounts later on.
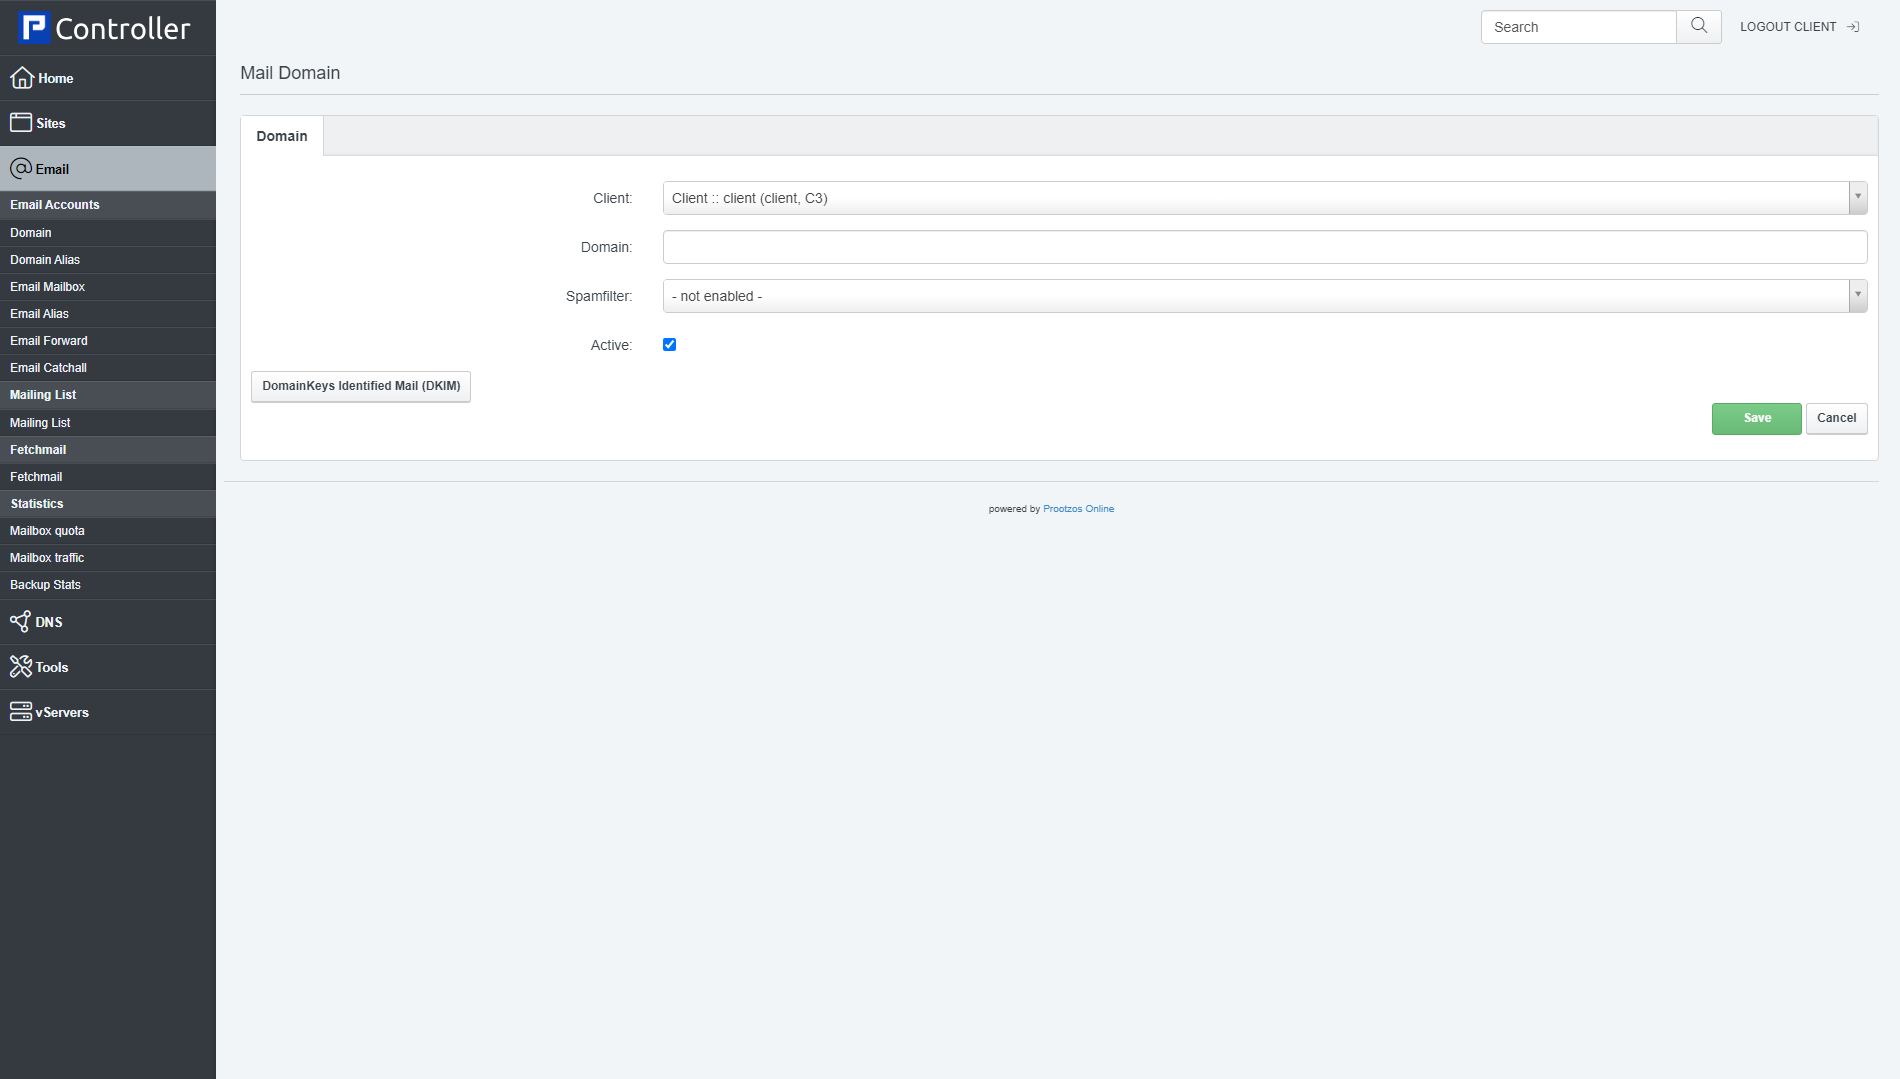
To create a new email domain, click on the Add new Domain button. This will lead you to the Mail Domain form with the tab Domain.
This form contains the following fields:
- Server: If more than one server is available, you can select the server on which the email domain will be located. It is possible that the email domain is located on another server than the web site domain.
- Client (Available only for resellers): Here you select the client that owns the email domain.
- Domain: Type in the email domain, e.g. example.com (this would lead to email addresses such as user@example.com). It is also possible to fill in subdomains, e.g. sub.example.com, which would result in email addresses such as user@sub.example.com.
- Spamfilter: Here you can specify if you want to enable the spamfilter for this domain, and if so, what spamfilter level to use: Non-Paying, Uncensored, Wants all spam, Wants viruses, Normal, Trigger happy, Permissive.
- Active: This defines whether this email domain is active or not.
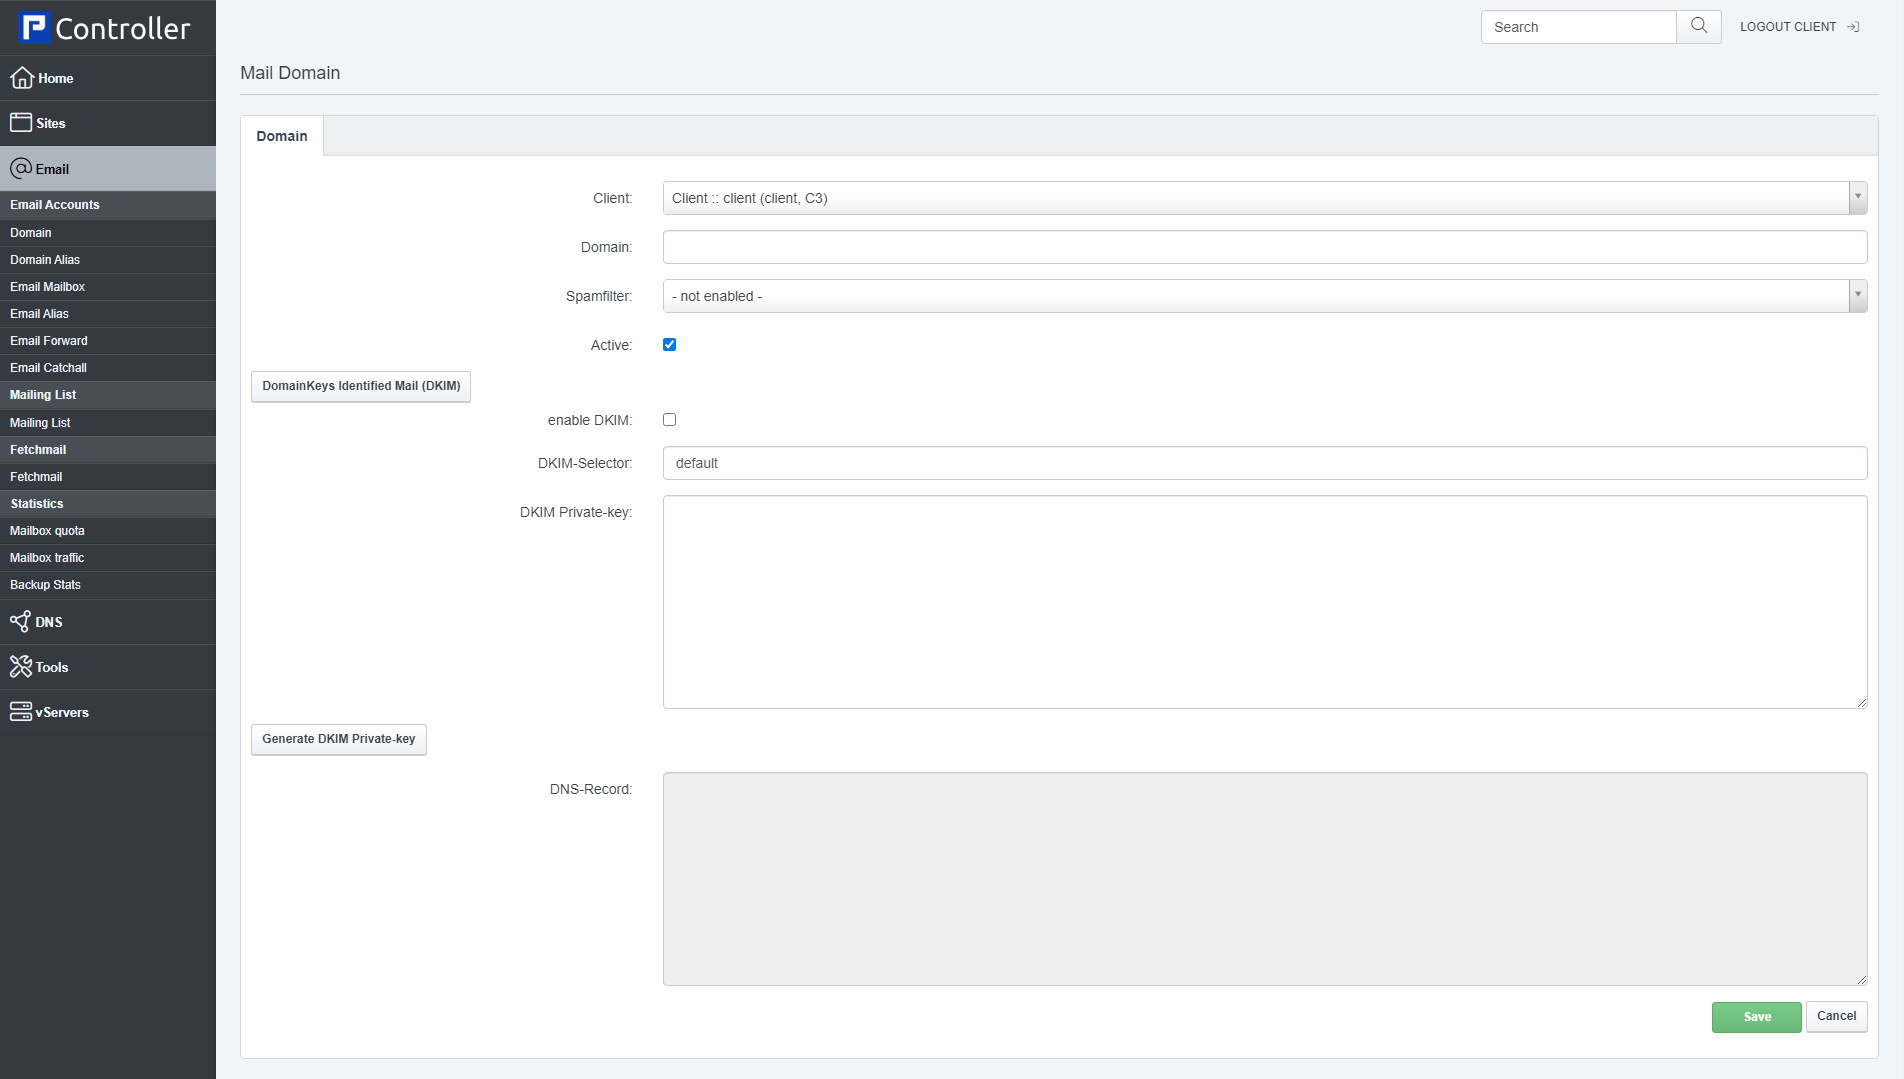
DomainKeys Identified Mail (DKIM)
Dkim is a method to digitally sign emails. It is used to validate the origin of an email and a commonly used method to prevent spam. The Email is signed with the private key and the public key is made available in DNS so that a receiving mail server can verify that the email was sent by an authorized mail system. The actual signing of emails is done by Rspamd which is also responsible for spam filtering and virus scans in the Controller mail server setup. Click on the [DomainKeys Identified Mail (DKIM)] button in the mail domain form to show the DKIM settings.
- Enable Dkim: Check this option to enable the DKIM function for all addresses of this domain.
- DKIM Selector: You can have multiple DKIM key instances, the DKIM selector is the name of the currently used key instance. Most users should leave this at default.
- DKIM Private-key: This field contains the private key that is used to sign emails. You can either paste an existing key here or press on the Generate DKIM Private-key button to create a new key.
- DNS-Record: This field shows the DNS-Record that needs to be added to the DNS zone of the domain. When the DNS-zone is managed in Controller, then this record will get added automaticaly, you can see it in the DNS zone record list in the DNS module.
3.1.2 Domain Alias
With domain aliases, you can map one email domain to another one. Let's assume you have created the email domains example.com and yourseconddomain.com, and have also created the email accounts user1@example.com and user2@example.com. Now you want to use the exact same mail boxes for yourseconddomain.com as well, i.e., user1@example.com and user1@yourseconddomain.com as well as user2@example.com and user2@yourseconddomain.com should be identical mail boxes. This can be achieved by mapping yourseconddomain.com to example.com - it can be imagined as a kind of symlink from yourseconddomain.com to example.com.
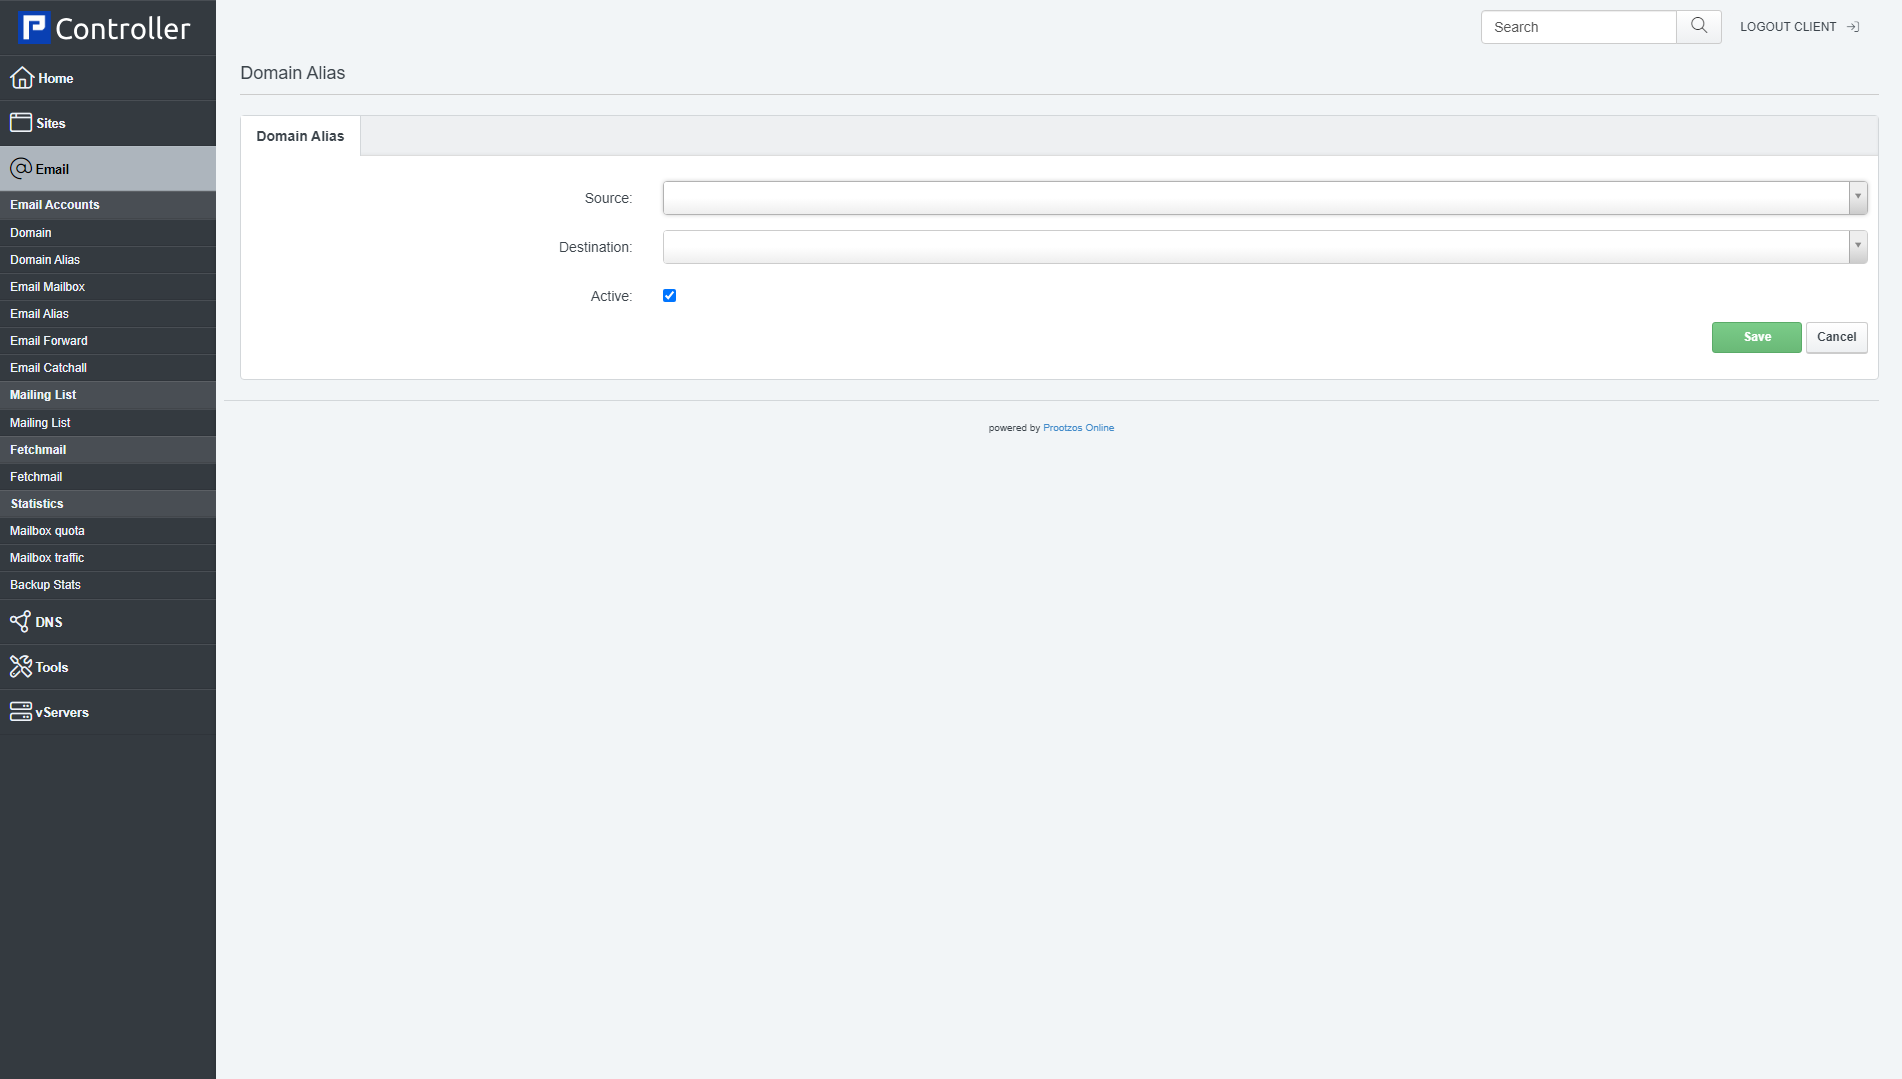
To create a new domain alias, click on the Add new Domain alias button. This will lead you to the Domain Alias form with the tab Domain Alias.
Domain Alias
This form has the following fields:
- Source: This is the domain that you want to map to another email domain. In our above example, this would be yourseconddomain.com.
- Destination: This is the email domain that the source domain should be mapped to. In our above example, this would be example.com.
- Active: This defines whether this domain alias is active or not.
3.1.3 Email Mailbox
This is where we create/modify/delete email accounts.
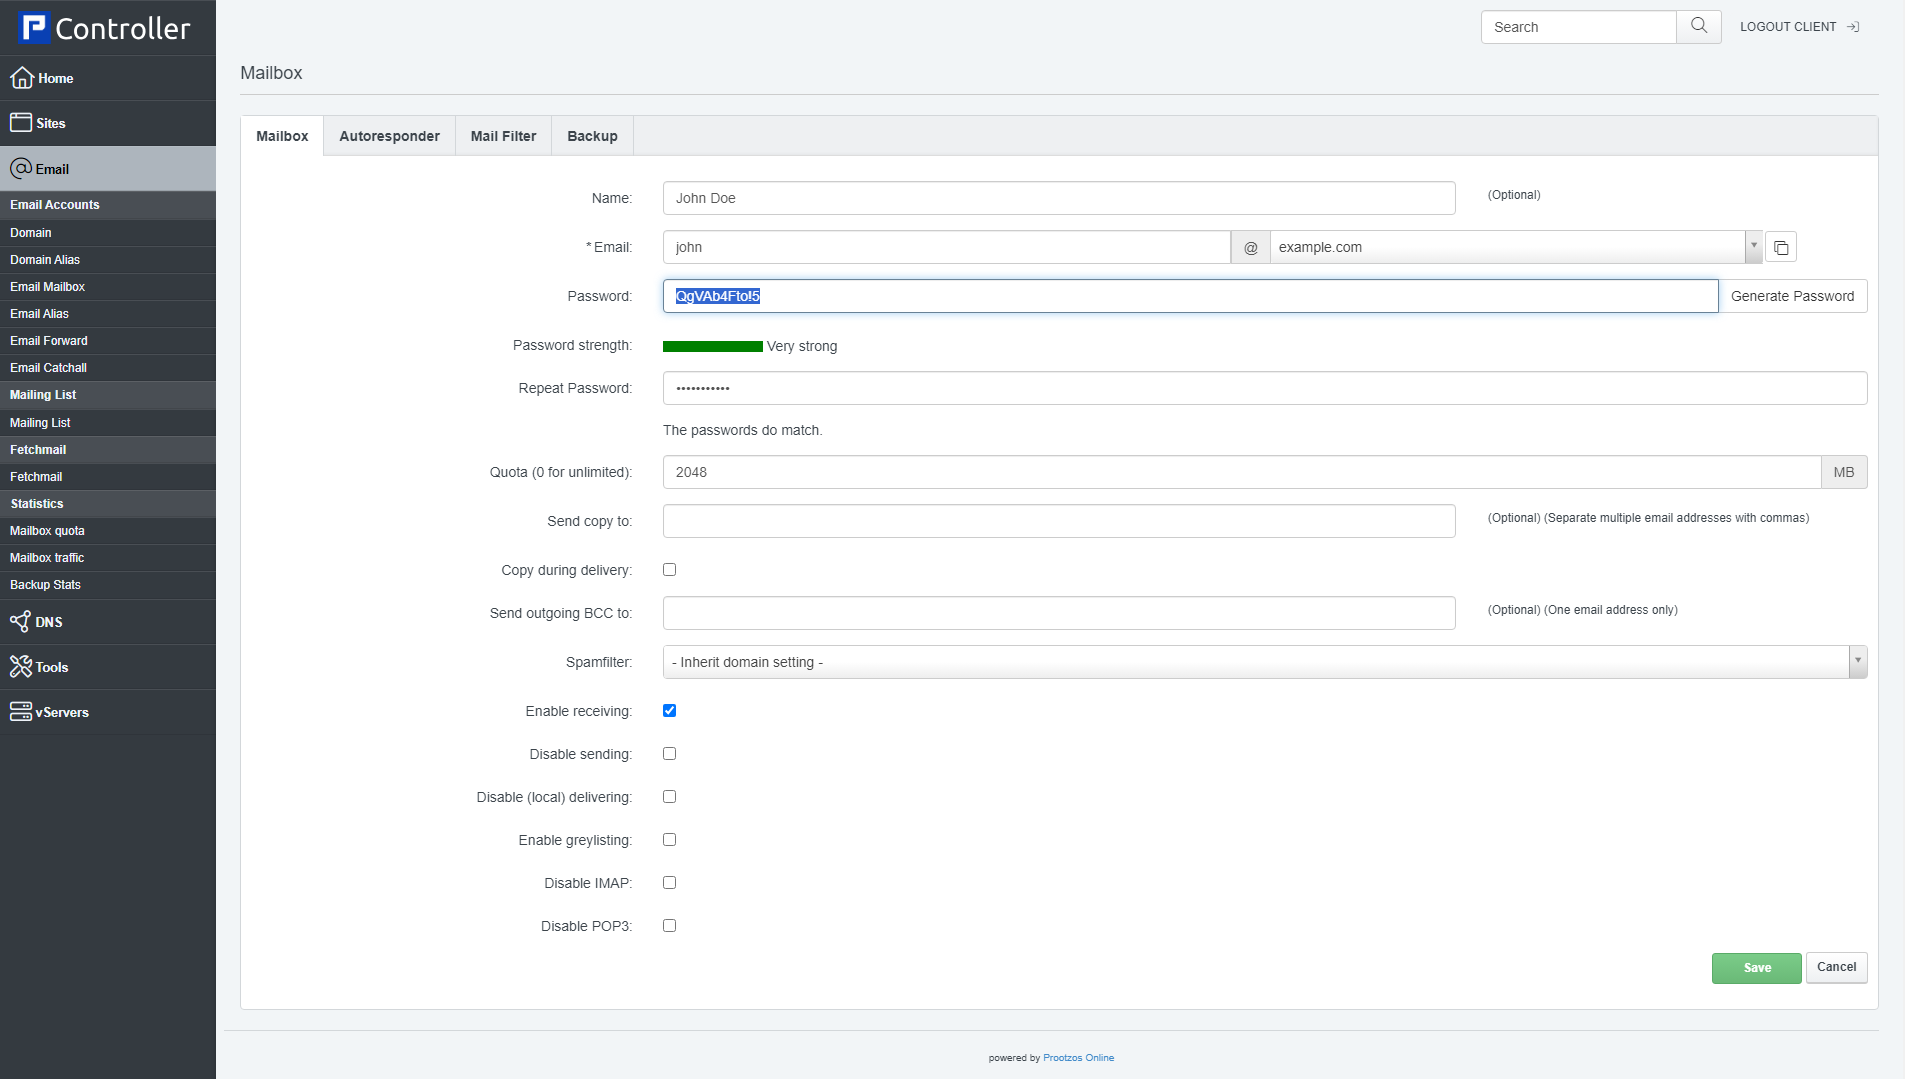
To create a new email account, click on the Add new Mailbox button. This will lead you to the Mailbox form with the tabs Mailbox, Autoresponder, Mail Filter and Backup.
Mailbox
This form has the following fields:
- Name: Type in the real name of the email user, e.g. John Doe. This field is optional.
- Email: This specification is split up in two fields, Alias and Domain. Alias contains the part in front of the @ sign (the "local part"), and in the Domain drop-down menu, you select the email domain. For example, if you want to create the email account john.doe@example.com, you'd fill in john.doe in the Alias field and select example.com from the Domain drop-down menu.
The email address is also the SMTP/POP3/IMAP username for the email account.
The local-part of an e-mail address may be up to 64 characters long and the domain name may have a maximum of 255 characters. However, the maximum length of a forward or reverse path length of 256 characters restricts the entire e-mail address to be no more than 254 characters. Some mail protocols, such as X.400, may require larger objects, however. The SMTP specification recommends that software implementations impose no limits for the lengths of such objects.
The local-part of the e-mail address may use any of these ASCII characters:
* Uppercase and lowercase English letters (a-z, A-Z)
* Digits 0 to 9
* Characters ! # $ % & ' * + - / = ? ^ _ ` { | } ~
* Character . (dot, period, full stop) provided that it is not the first or last character, and provided also that it does not appear two or more times consecutively (e.g. John..Doe@example.com).
Additionally, quoted-strings (e.g. "John Doe"@example.com) are permitted, thus allowing characters that would otherwise be prohibited, however they do not appear in common practice. RFC 5321 also warns that "a host that expects to receive mail SHOULD avoid defining mailboxes where the Local-part requires (or uses) the Quoted-string form".
The local-part is case sensitive, so "jsmith@example.com" and "JSmith@example.com" may be delivered to different people. This practice is discouraged by RFC 5321. However, only the authoritative mail servers for a domain may make that decision (on our mailservers the local part is not case sensitive).
Within the rules set out in the RFCs, organisations are free to restrict the forms their own e-mail addresses take however they wish, e.g. many organizations do not use certain characters, e.g. space, ?, and ^, and most organizations treat uppercase and lowercase letters as equivalent. Hotmail, for example, only allows creation of e-mail addresses using alphanumerics, dot (.), underscore (_) and hyphen (-).
Systems that send mail, of course, must be capable of handling outgoing mail for all addresses. Contrary to the relevant standards, some defective systems treat certain legitimate addresses as invalid and fail to handle mail to these addresses. Hotmail, for example, incorrectly refuses to send mail to any address containing any of the following legitimate characters: ! # $ % * / ? ^ ` { | } ~ - Password: Type in a password for the email account (or use the Generate Password link to have Controller generate one for you). The Password strength field will show how weak or strong your password is. A strong password should include numbers, symbols, upper and lowercase letters; password length should be 8 characters or more; avoid any password based on repetition, dictionary words, letter or number sequences, usernames, relative or pet names, or biographical information.
- Repeat Password: Confirm your password.
- Quota: This is the max. amount of disk space (in MB) that is available for this email account.
- Send copy to: Here you can specify an email address that should receive a copy of all incoming mails for this email account. This field is optional.
- Send outgoing copy to: Here you can specify an email address that should receive a copy of all outgoing mails of this email account. This field is optional.
- Spamfilter: Here you can specify if you want to enable the spamfilter for this email account, and if so, what spamfilter level to use: Non-Paying, Uncensored, Wants all spam, Wants viruses, Normal, Trigger happy, Permissive. Please note that this setting overrides the spamfilter setting of the mail domain (no matter what spamfilter level you chose for the mail domain; this is true even if you disabled the spamfilter for the mail domain), with one exception: If you choose to not enable the spamfilter for this email account, but the spamfilter is enabled for the mail domain, then the spamfilter setting of the mail domain is used for this email account. Use Uncensored to disable the spamfilter.
- Enable Receiving: If you don't check this box, then incoming emails for this mail account will be rejected. This makes sense if you want to use this account only for sending mail, but not for receiving.
- Disable SMTP: Disable email sending over this account.
- Enable Greylisting: Enable the Greylisting function for this mailbox. Greylisting is a method to prevent SPAM by delaying incoming email when you receive the first email of a unknown sender.
Please see here for a detailed explanation: https://en.wikipedia.org/wiki/Greylisting - Disable IMAP: If you check this box, you cannot use IMAP to access the mails of this mailbox.
- Disable POP3: If you check this box, you cannot use POP3 to access the mails of this mailbox.
Autoresponder
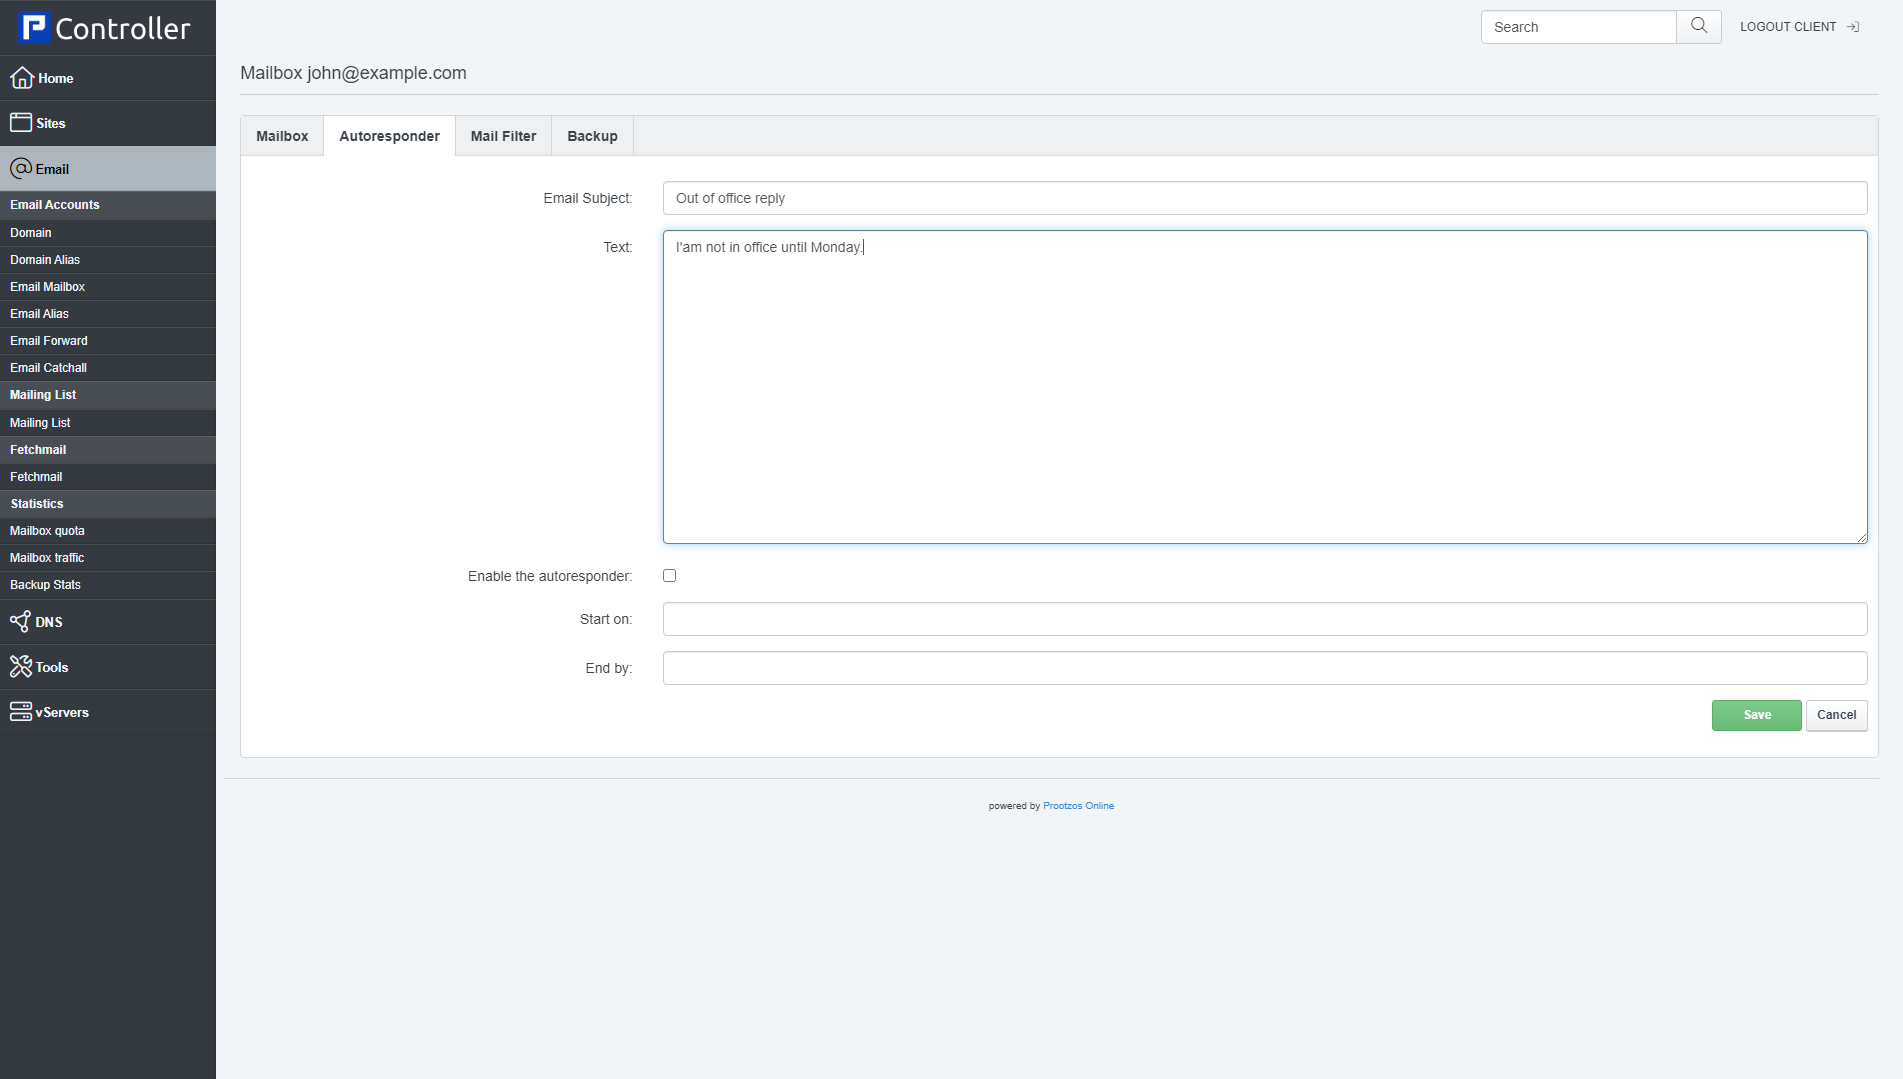
With the autoresponder you have the possibility to automatically send replies to incoming mails (e.g. if you are on holidays).
The form has the following fields:
- Email Subject: Specify the subject to be used for autoresponder messages.
- Text: Enter your autoresponder message in this field.
- Enable the autoresponder: This defines whether this autoresponder is currently active or not.
- Start on: Here you can define when the autoresponder should start (day - month - year - hour - minute).
- End by: Here you can define when the autoresponder should stop (day - month - year - hour - minute). If you don't specify an end date, the autoresponder will be active forever.
Mail Filter
On this tab you can define filters for incoming emails. One common filter has already been defined for you:
- Move Spam Emails to Junk directory: If you check this, emails that are tagged as spam by the spamfilter will automatically be moved to the junk folder. Please note that you can access the junk folder only if you use IMAP. This filter is active only if the spamfilter is active for this email account (i.e., a spamfilter level other than Uncensored must be selected, either for the whole mail domain or specifically for this email account).
To create custom email filters, click on the Add new Filter button. This will lead you to the Email filter form with the tab Filter.
Email Filter - Filter
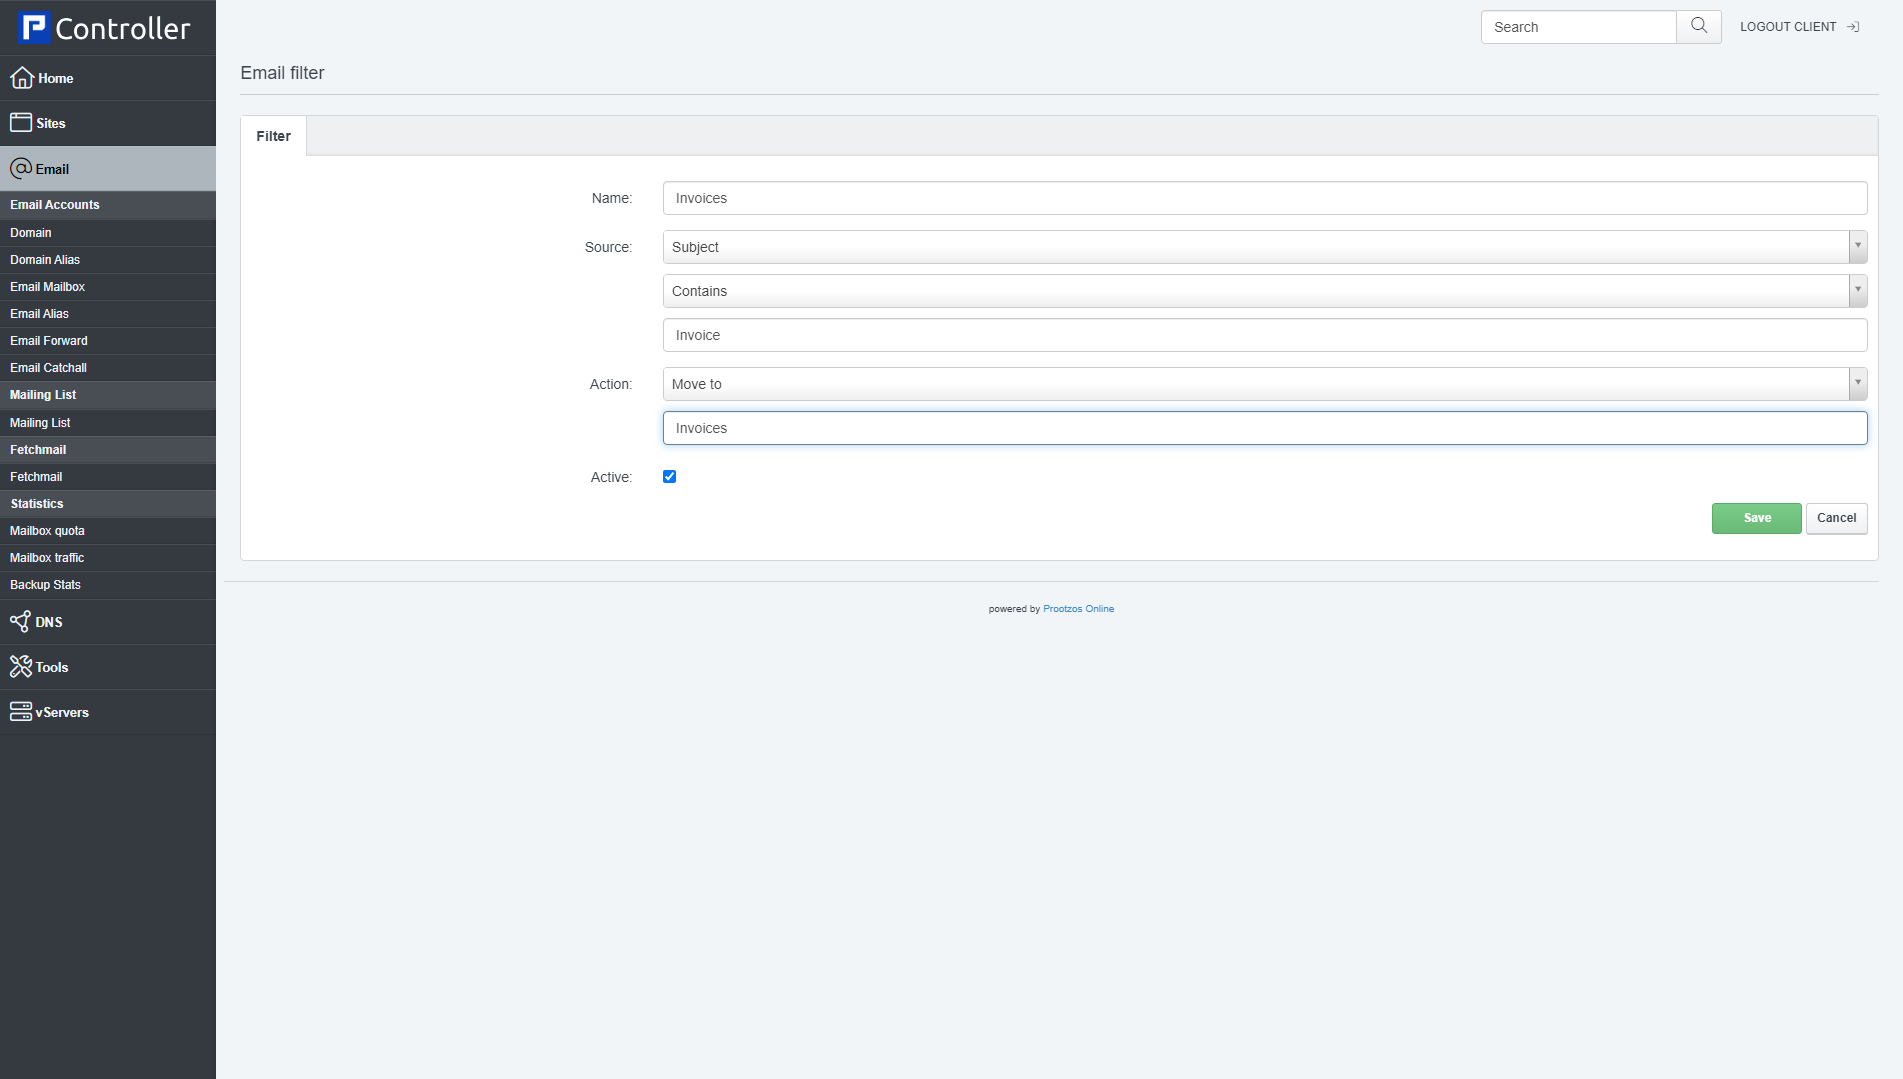
The form to create a custom email filter has the following fields:
- Name: Specify a name for this filter rule. Examples: Spam, Work, Private, Prootzos, Newsletter, etc.
- Source: This defines the criteria based on which emails will be filtered. Select the field from the email header that should be examined (Subject, From, To), then select when this filter should be used (if the field Contains, Is, Begins with, Ends with the string that you specify), and finally specify a search string. If you select From or To in the first field and we assume that the email address is specified as John Doe <john.doe@example.com>, you can specify an email address here (john.doe@example.com) or a name (John Doe) - in both cases you should select Contains instead of Is.
- Action: Specify what to do with the emails if the filter applies. If you select Move to, you must also specify a folder name in the field right of the drop-down menu. If this folder doesn't exist, it will automatically be created. Please note that you can access this folder only if you use IMAP. If you select Delete, the emails will be deleted, and there's no need to specify a folder.
- Active: This defines whether this filter rule is currently active or not.
Backup
On the Backup tab you can specify whether you want to create backups of the current mailbox.
- Backup interval: Select whether you want Controller to create backups for this mailbox, and if so, how often (daily/weekly/monthly).
- Number of backup copies: Specify how many backups should be kept on the system. For example, if you select to have a daily backup and pick 10 in the Number of backup copies field, the system will keep backups of the last ten days; backups that are older will automatically be deleted.
To restore a backup, click on the Restore button next to the backup you want to restore. The restore will be processed in the next few minutes.
3.1.4 Email Alias
An email alias is the same as a domain alias, except that it is used to map an email address to another email address instead of mapping a whole email domain to another email domain.
To create a new email alias, click on the Add new Email alias button. This will lead you to the Email Alias form with the tab Email Alias.
Email Alias
This form has the following fields:
- Email: This specification is split up in two fields, Alias and Domain. Alias contains the part in front of the @ sign (the "local part") - it should be an alias that doesn't already exist for this domain -, and in the Domain drop-down menu, you select the email domain. For example, if you want to create the email alias info@example.com, you'd fill in info in the Alias field and select example.com from the Domain drop-down menu.
The local-part of an e-mail address may be up to 64 characters long and the domain name may have a maximum of 255 characters. However, the maximum length of a forward or reverse path length of 256 characters restricts the entire e-mail address to be no more than 254 characters. Some mail protocols, such as X.400, may require larger objects, however. The SMTP specification recommends that software implementations impose no limits for the lengths of such objects.
The local-part of the e-mail address may use any of these ASCII characters:
* Uppercase and lowercase English letters (a-z, A-Z)
* Digits 0 to 9
* Characters ! # $ % & ' * + - / = ? ^ _ ` { | } ~
* Character . (dot, period, full stop) provided that it is not the first or last character, and provided also that it does not appear two or more times consecutively (e.g. John..Doe@example.com).
Additionally, quoted-strings (e.g. "John Doe"@example.com) are permitted, thus allowing characters that would otherwise be prohibited, however they do not appear in common practice. RFC 5321 also warns that "a host that expects to receive mail SHOULD avoid defining mailboxes where the Local-part requires (or uses) the Quoted-string form".
The local-part is case sensitive, so "jsmith@example.com" and "JSmith@example.com" may be delivered to different people. This practice is discouraged by RFC 5321. However, only the authoritative mail servers for a domain may make that decision (on our mail servers the local part is not case sensitive).
Within the rules set out in the RFCs, organisations are free to restrict the forms their own e-mail addresses take however they wish, e.g. many organizations do not use certain characters, e.g. space, ?, and ^, and most organizations treat uppercase and lowercase letters as equivalent. Hotmail, for example, only allows creation of e-mail addresses using alphanumerics, dot (.), underscore (_) and hyphen (-).
Systems that send mail, of course, must be capable of handling outgoing mail for all addresses. Contrary to the relevant standards, some defective systems treat certain legitimate addresses as invalid and fail to handle mail to these addresses. Hotmail, for example, incorrectly refuses to send mail to any address containing any of the following legitimate characters: ! # $ % * / ? ^ ` { | } ~ - Destination: Select the email account that you want to map this email alias to. If you want to map info@example.com to john.doe@example.com, you'd select john.doe@example.com here. The destination email address is also the SMTP/POP3/IMAP username for the email account.
- Active: This defines whether this email alias is active or not.
- Send as: Enable this option to allow the user that is logged in with the target mailbox by SMTP to use this alias address as sender address.
- Enable Greylisting: Enable the greylisting function for this alias. Greylisting is a method to prevent SPAM by delaying incoming email when you receive the first email of a unknown sender. Please see here for a detailed explanation: https://en.wikipedia.org/wiki/Greylisting
3.1.5 Email Forward
With this feature you can make the mail system automatically forward emails for an email address to one or more other email accounts. For example, you can use this function to define an email address for a group of people, e.g. colorshop@mycolorshop.com, and forward emails to that address to all members of the dance class, like painter1@mycolorshop.com, painter2@mycolorshop.com, painter3@mycolorshop.com, etc.
To create a new email forward, click on the Add new Email forward button. This will lead you to the Email Forward form with the tab Email Forward.
Email Forward
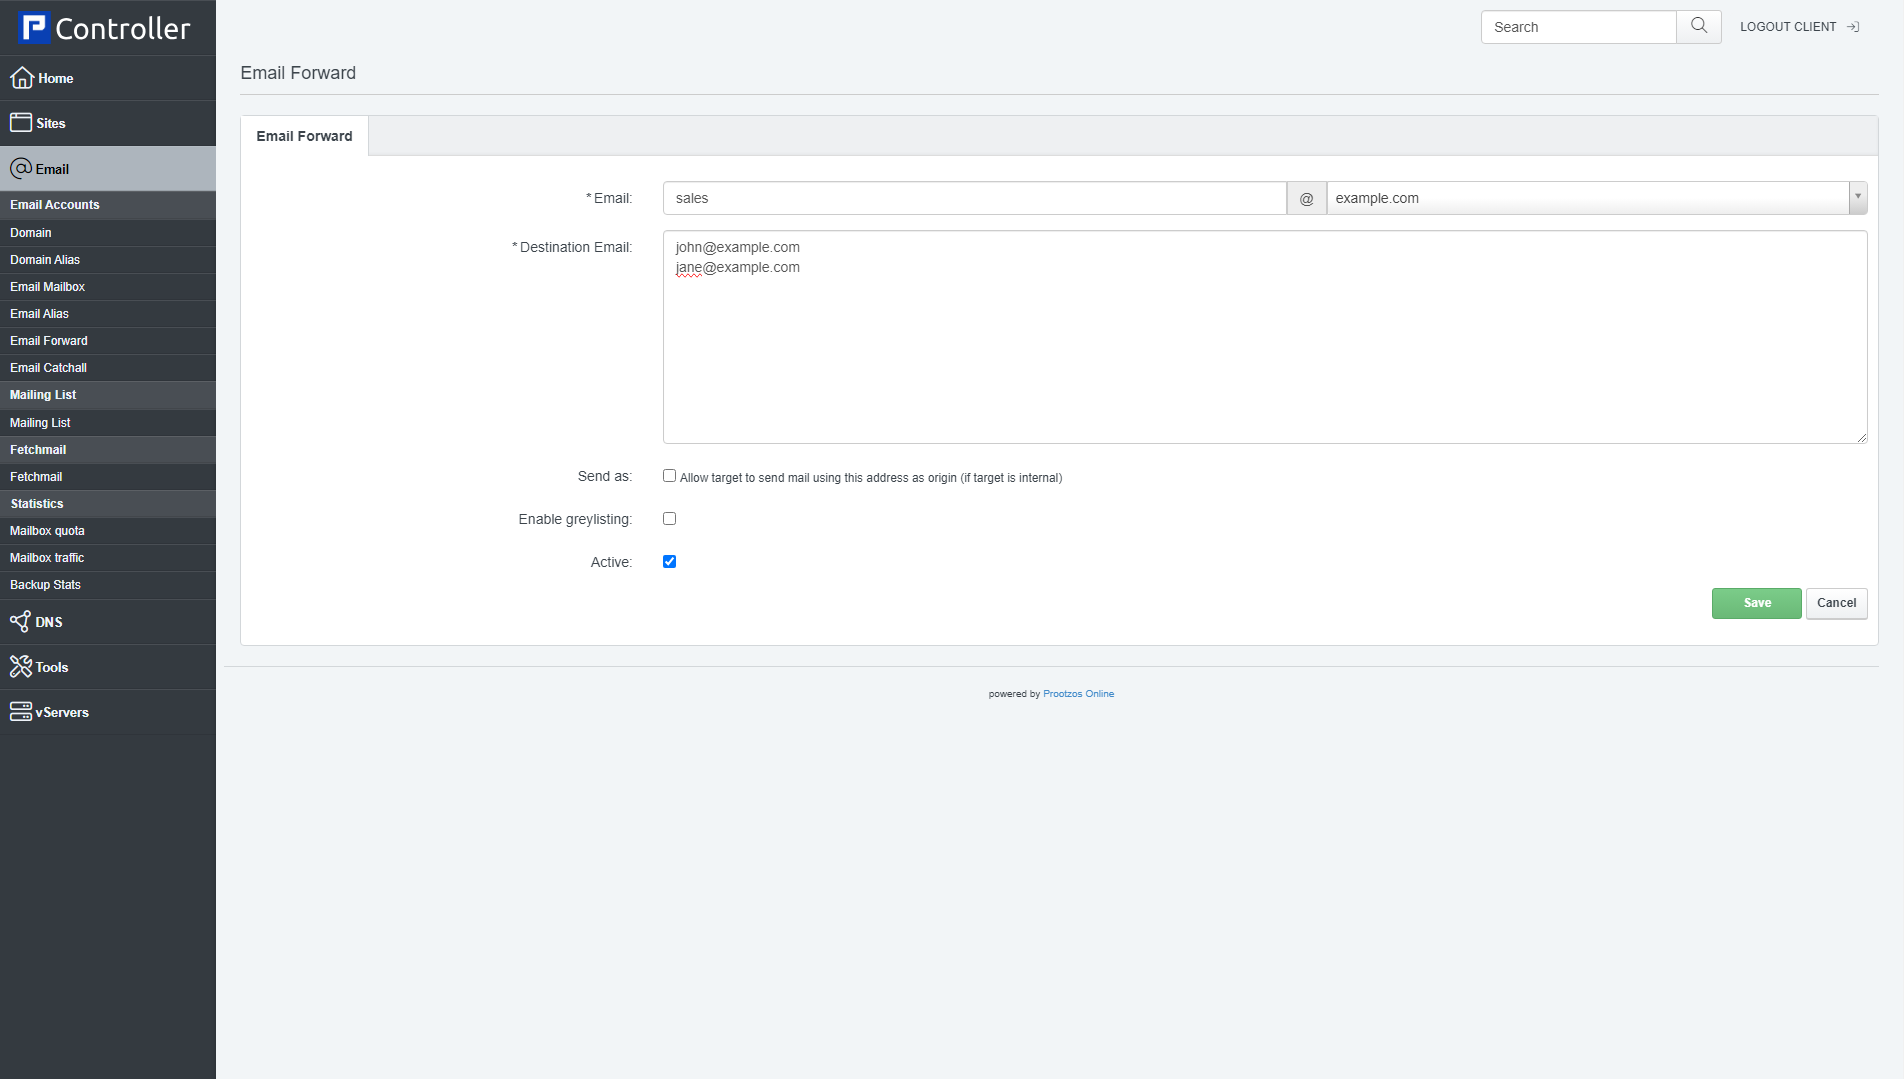
The form has the following fields:
- Email: This specification is split up in two fields, Alias and Domain. Alias contains the part in front of the @ sign (the "local part") - it should be an alias that doesn't already exist for this domain -, and in the Domain drop-down menu, you select the email domain. For example, if you want to create an email forward for the email address colorshop@mycolorshop.com, you'd fill in colorshop in the Alias field and select mycolorshop.com from the Domain drop-down menu.
The local-part of an e-mail address may be up to 64 characters long and the domain name may have a maximum of 255 characters. However, the maximum length of a forward or reverse path length of 256 characters restricts the entire e-mail address to be no more than 254 characters. Some mail protocols, such as X.400, may require larger objects, however. The SMTP specification recommends that software implementations impose no limits for the lengths of such objects.
The local-part of the e-mail address may use any of these ASCII characters:
* Uppercase and lowercase English letters (a-z, A-Z)
* Digits 0 to 9
* Characters ! # $ % & ' * + - / = ? ^ _ ` { | } ~
* Character . (dot, period, full stop) provided that it is not the first or last character, and provided also that it does not appear two or more times consecutively (e.g. John..Doe@example.com).
Additionally, quoted-strings (e.g. "John Doe"@example.com) are permitted, thus allowing characters that would otherwise be prohibited, however they do not appear in common practice. RFC 5321 also warns that "a host that expects to receive mail SHOULD avoid defining mailboxes where the Local-part requires (or uses) the Quoted-string form".
The local-part is case sensitive, so "jsmith@example.com" and "JSmith@example.com" may be delivered to different people. This practice is discouraged by RFC 5321. However, only the authoritative mail servers for a domain may make that decision (on our mail servers the local part is not case sensitive).
Within the rules set out in the RFCs, organisations are free to restrict the forms their own e-mail addresses take however they wish, e.g. many organizations do not use certain characters, e.g. space, ?, and ^, and most organizations treat uppercase and lowercase letters as equivalent. Hotmail, for example, only allows creation of e-mail addresses using alphanumerics, dot (.), underscore (_) and hyphen (-).
Systems that send mail, of course, must be capable of handling outgoing mail for all addresses. Contrary to the relevant standards, some defective systems treat certain legitimate addresses as invalid and fail to handle mail to these addresses. Hotmail, for example, incorrectly refuses to send mail to any address containing any of the following legitimate characters: ! # $ % * / ? ^ ` { | } ~ - Destination Email: Fill in one or more email addresses (one email address per line) that the email should be forwarded to.
- Send as: Enable this option to allow the user that is logged in with the target mailbox by SMTP to use this alias address as sender address.
- Enable Greylisting: Enable the greylisting function for this alias. Greylisting is a method to prevent SPAM by delaying incoming email when you receive the first email of a unknown sender. Please see here for a detailed explanation: https://en.wikipedia.org/wiki/Greylisting
- Active: This defines whether this email forward is active or not.
3.1.6 Email Catchall
If you want all emails that are addressed to non-existing mail boxes of a domain to arrive in an existing email box of this domain, you can create a catchAll for this email account. Example: You have configured the email address info@example.com. Someone sends an email to abc@example.com which does not exist. If info@example.com is a catchAll email address the email arrives here. If there is no catchAll email address for this domain the sender of the mail to abc@example.com gets back an error message ("error: no such user here"). Please note: Per domain there can be only one catchAll email address.
To create a new email catchAll, click on the Add new Catchall button. This will lead you to the Email Catchall form with the tab Email Catchall.
Email Catchall
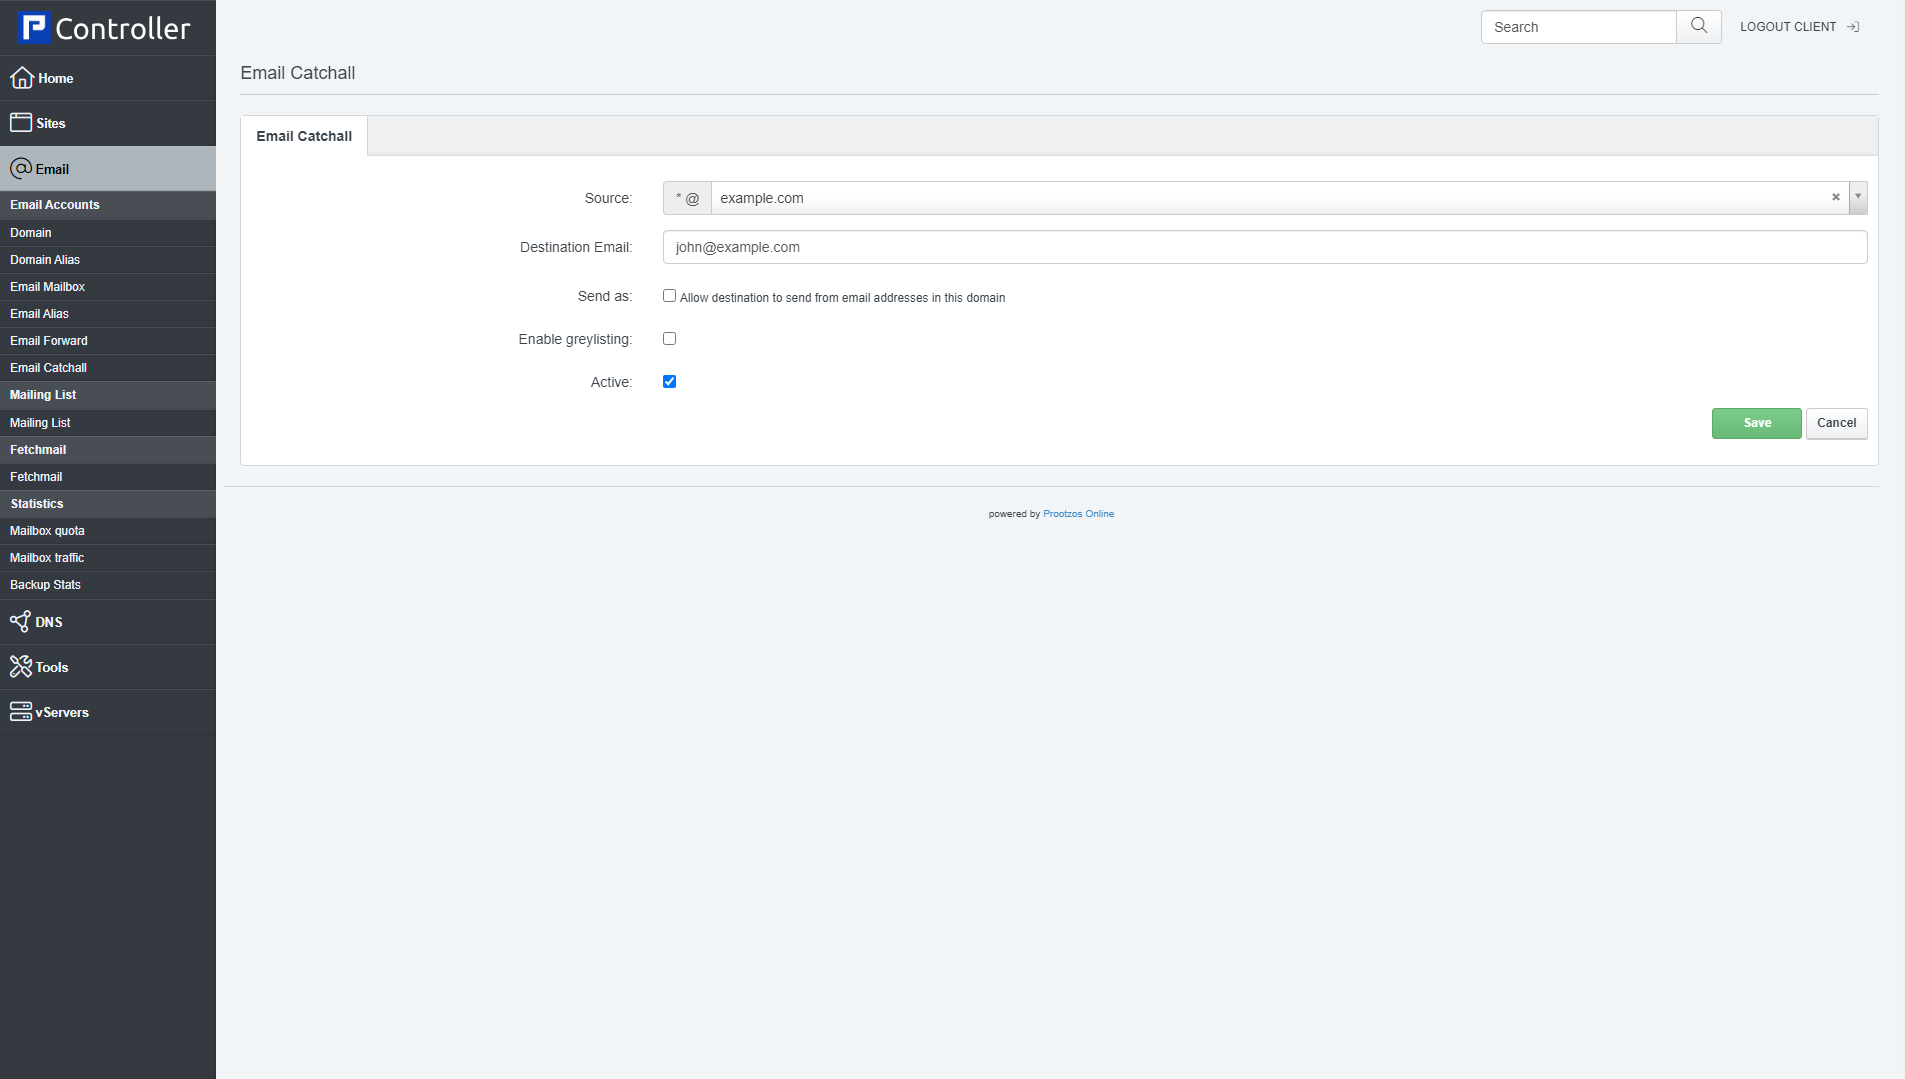
The form has the following fields:
- Source: Select the domain for which you want to create a catchAll.
- Destination: Select the catchAll email account - i.e., the email account that should receive all emails to non-existing email addresses of this domain.
- Send as: Allow destination to send from email addresses in this domain.
- Enable greylisting: Enable the greylisting function for this alias. Greylisting is a method to prevent SPAM by delaying incoming email when you receive the first email of a unknown sender. Please see here for a detailed explanation: https://en.wikipedia.org/wiki/Greylisting
- Active: This defines whether this email catchAll is active or not
3.2 Mailing List
Mailing lists are not available at this moment.
3.3 Fetchmail
This feature can be used to retrieve emails from a remote POP3 or IMAP account and put them into a local mailbox. Although this feature is called "Fetchmail" here, Controller uses getmail instead of fetchmail under the hood.
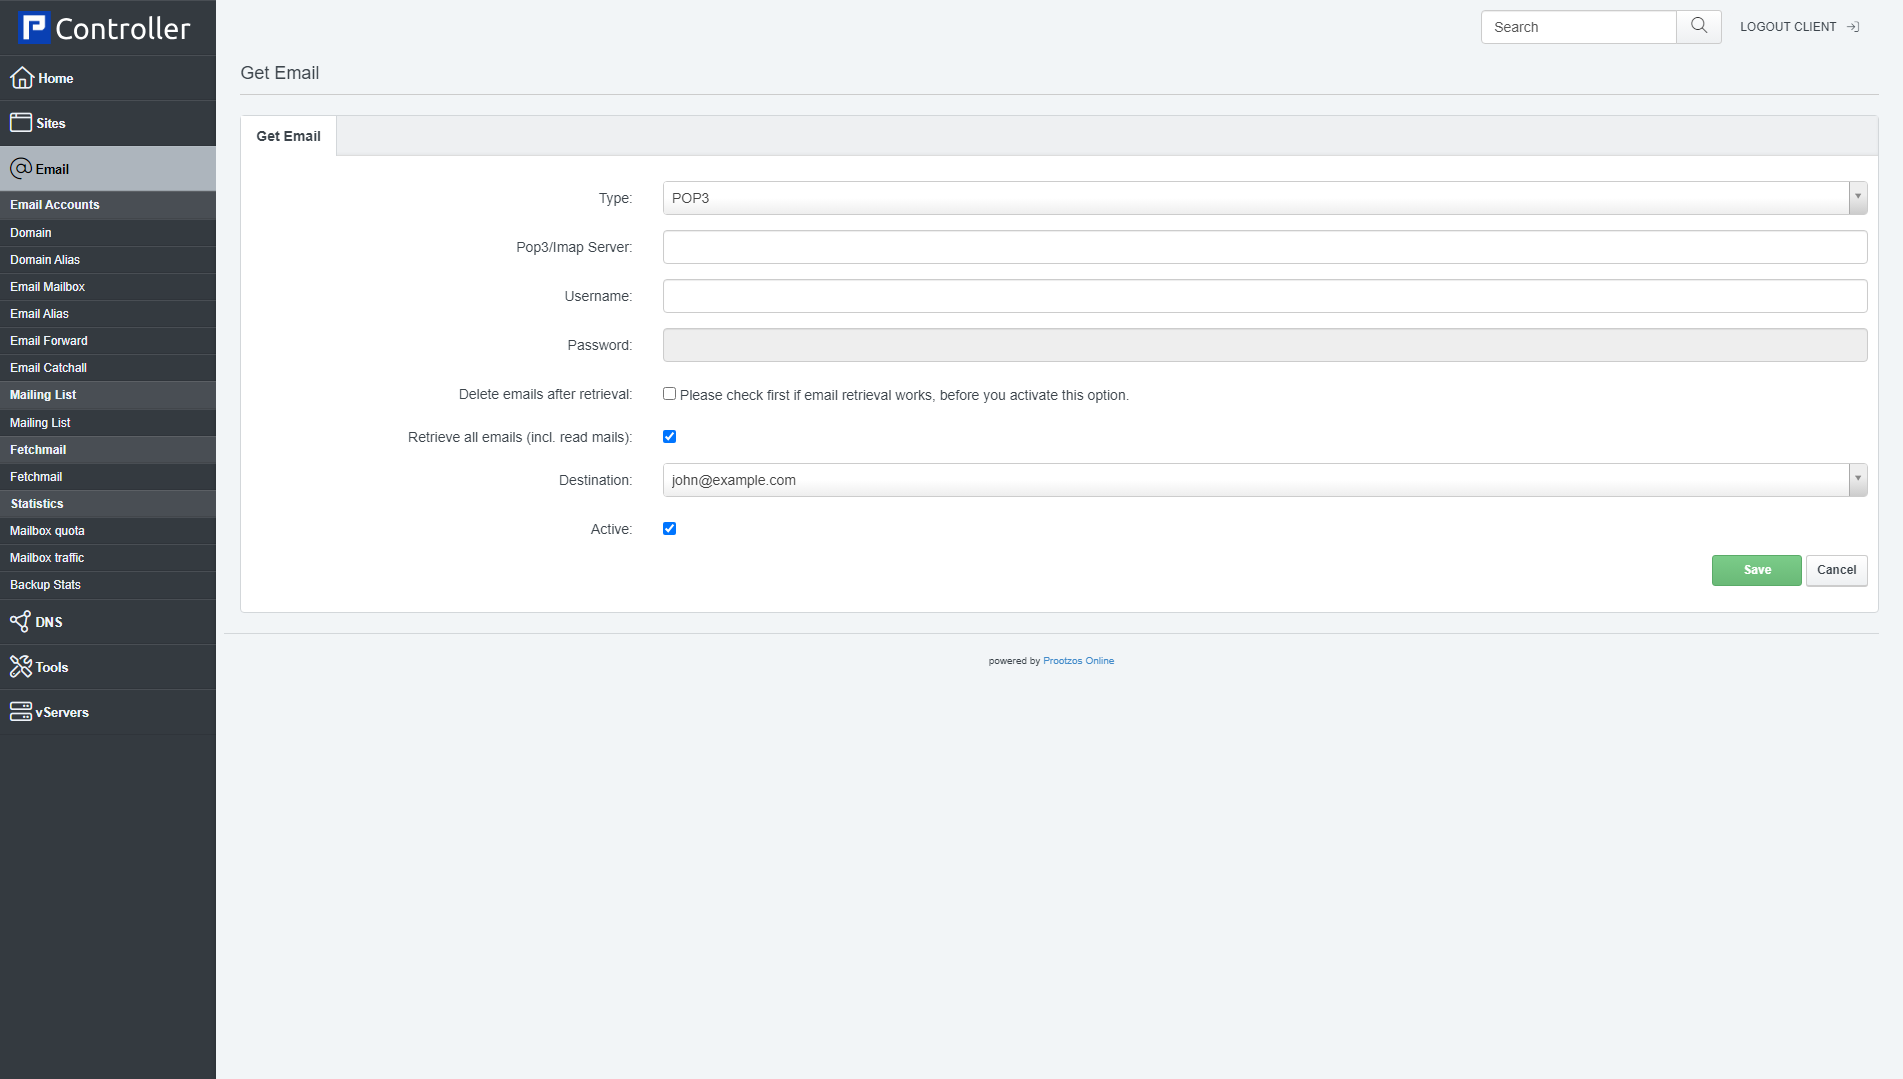
To create a new Fetchmail account, click on the Add new Account button. This will lead you to the Get Email form with the tab Get Email.
Get Email
This form has the following fields:
- Type: Select the protocol to use to retrieve emails from the remote account (POP3, IMAP, POP3SSL, IMAPSSL).
- Pop3/Imap Server: Specify the hostname of the remote mail server, e.g. mail.example.com.
- Username: Specify the username of the remote email account.
- Password: Specify the user's password.
- Delete emails after retrieval: Select if you want emails to be automatically deleted on the remote host after they have been retrieved.
- Retrieve all emails (incl. read mails): By default, only new emails will be retrieved from the remote server. If you check this box, read emails will be retrieved as well.
- Destination: Select the destination mailbox for the retrieved emails.
- Active: This defines whether this Fetchmail account is active or not.
3.4 Statistics
The Statistics section is a bit special in that there's nothing that you can configure here. This section just displays statistics for your email accounts.
3.4.1 Mailbox Quota
Under Mailbox quota you can see used space (in KB) for your email accounts.
3.4.2 Mailbox Traffic
Under Mailbox traffic you can see traffic statistics (in MB) for your email accounts for the current month, the month before, the current year, and the year before. Please note that this traffic covers only incoming traffic, not outgoing emails. Not Available
3.4.3 Backup Stats
Under Backup stats you can see the backup interval, number of backup copies and used space (in MB) for your email account backups. These statistics are updated once per night.
